Vegan Eats: Easy Homemade Dough & Pizza Recipes

Last week I was craving pizza! Rather than go out and get some, I wanted to challenge myself to make it on my own and I also needed to use up some things in the fridge. I have purchased pre-made crusts in the past, but they’re never as good as homemade and they have all the extra pesky packaging. Trying to avoid purchasing pre-made things if I can make them from scratch at home and to get more on board with the low-waste vegan living, but some things you just have to buy at the store (ie. most vegan cheese – although, I can make a mean cashew cheese myself).

The dough is so easy to make and you have so many variations with toppings. Next time I think I’ll try a buffalo, pesto, or barbeque base! I split the dough into two portions, so I had one pizza one day and a different type the next – which explains the two different outfits haha.

ACC-Pizza-WebSize-1806001.jpg
ACC-Pizza-WebSize-1806002.jpg
ACC-Pizza-WebSize-1806010.jpg
ACS-Blog-CranberryDillCashew2.jpg

Dough:

-1 package (2 ¼ tsp) active dry yeast

-1 cup warm water

-1 tbsp sugar

-2 tbsp olive oil

-2 cups all-purpose flour (plus more as needed)
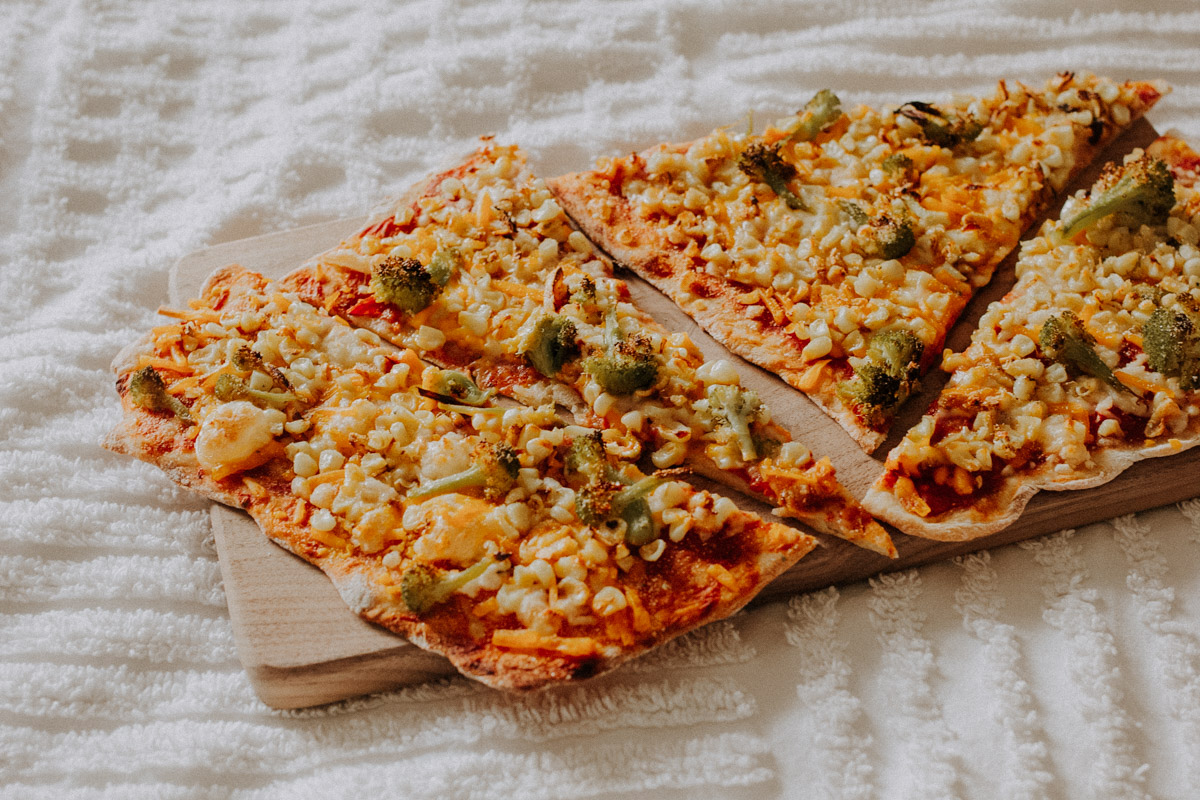
 

Day 1 Pizza

-1/2 of dough

-2/3 cup tomato sauce

-3/4 cup vegan cheese shreds

-1/3 cup corn

-1/3 cup broccoli florets (steamed)

-3 cloves garlic (minced)

-Garlic salt to taste


Day 2 Pizza

-1/2 of dough

-2/3 cup tomato sauce

-3 slices vegan mozzarella

-1 vine tomato (diced)

-1/4 cup corn

-1/4 cup onion (diced)

-4 cloves garlic (minced)

-Handful of basil leaves

-Garlic salt to taste

ACC-Pizza-WebSize-1806007.jpg
ACS-Blog-Directions.jpg

Dough:

1. Combine the yeast, warm water, and sugar in a large mixing bowl and allow mixture to rest for about 5 minutes.

2. Add the olive oil, flour, and salt adding more flour as needed to make for soft pizza dough. The dough should be a little sticky but not overly gooey and you should be able to work with it with your hands. If it is too gooey, add more flour.

3. On a lightly floured surface, kneed the dough for 5-10 minutes. Once completed, put the dough into a greased bowl and let sit in a warm place for an hour. During this time, the dough should rise quite a bit.

4. Once the dough has risen, take out of bowl and kneed again on a floured surface. Cut dough in half and save half for later.

Pizza:

1. Preheat oven to 500 degrees. Sautee veggies and fix-ins in a lightly greased pan and add water as needed in 1 tsp -1 tbsp increments.

2. As toppings are cooking, prepare the base of your pizza. Roll and flatten half of dough into your desired shape on your pizza pan or tray. Add tomato sauce and sprinkle cheese evenly on top of pizza. You can add any toppings or seasonings that don’t need to be sautéed separately now (ie. basil)

3. Once toppings have been sufficiently cooked, spread over pizza and pop in the oven for 25-35 minutes or until crust is golden brown.

4. Add any additional seasonings you may want (ie. garlic salt, red pepper, vegan grated parmesan), slice, and enjoy! 

ACC-Pizza-WebSize-1806005.jpg
ACC-Pizza-WebSize-1806003.jpg

Banana Berry Smoothie Bowl feat. Zero Waste Almond Milk Maker, Almond Cow

GUYS! Need to tell you about my new almond milk maker from Almond Cow. I had been wanting to start making my own plant-based milks, so when Almond Cow approached me I was so excited! Basically, it’s a super easy nut milk maker that takes less than a minute to make once you’ve prepped and soaked the nuts.

There is a fast-growing trend for plant-based food products in general, especially dairy replacements, following research about the effects of the dairy industry on the environment, including environmental pollution, harm to animals, and negative effects to human health. A great resource for  learning about the negative health effects of dairy consumption is nutritionfacts.org. Here is the link to dairy specific topics.

Consuming lots of dairy products, including milk, cheese, yogurt, and ice cream is very engrained in our society, and an important part of our traditions and culture—but people often don’t take a step back to ask why we do this and how the consumption of dairy products affects others and our planet. This is one of the many reasons I’m a vegan.  

I’ve been buying plant-based milks at the store for years now and they’re great – love them! However, most of the packaging is not recyclable and has bits and pieces of plastic and there is often many other additives in the milks. These additives aren’t bad necessarily, but it’s nice to know exactly what’s going into your food and there is a sense of pride in making your stuff from scratch.

I started off with making some classic almond milk, chocolate almond milk, and then dove into a tasty smoothie bowl. Without further adieu, here are the recipes:

ACC-AlmondCow-WebSize-1805010.jpg
ACS-Blog-CranberryDillCashew2.jpg

ALMOND MILK:

makes 2-3 pitchers

-1 cup soaked almonds (4+ hours)

-6 cups of water

-Pinch of salt

-1/2 tsp of vanilla extract

-4 tbsp agave nectar 

-1/4 cup cocoa powder (for the chocolate almond milk!)

SMOOTHIE BOWL:

makes one serving

-1/2 cup frozen berries

-1 frozen banana

-1 cup almond milk from above recipe 

-1 tsp of chia seeds

-1 tsp of flaxmeal

-1 tsp of hemp seeds

-4 tbsp granola 

-1 tbsp gogi beries

-2-5 strawberries sliced

-1/2 banana sliced

-1/4 of mango sliced

-

ALMOND MILK: 

1. Take 1/3 of soaked almonds and place in cup of Almond Cow

2. Add water into base of Almond Cow

3. Close container and press Almond Cow button on top

4. After Almond Cow turns off, pour out milk into a pitcher container

5. Stir in rest of ingredients

6. Repeat process 2 more times. The Almond Cow portion size makes about 2-3 pitchers worth.

7. For chocolate almond milk, stir in the cocoa powder until blended completely

*Rather than tossing almond pulp, you can save/freeze pressed almond pulp to make almond cheese or compost scraps!

SMOOTHIE BOWL:

-Blend frozen berries, frozen banana, and almond milk

-Pour in a bowl and add remaining toppings; granola, gogi berries, hemp seeds, chia seeds, flaxmeal, sliced strawberries, sliced mango, and sliced banana.

-Enjoy!

ACC-AlmondCow-WebSize-1805002.jpg
ACC-AlmondCow-WebSize-1805003.jpg
ACC-AlmondCow-WebSize-1805005.jpg
ACC-AlmondCow-WebSize-1805006.jpg

Zero Waste Toothpaste feat. Gondola Bamboo Toothbrushes

In honor of Earth Day tomorrow, I’d like to encourage conversation about “living more sustainably”.  Small changes can make a difference! I try my best to introduce and continue sustainable practices whenever possible (and practical).  Many of us create a lot of unnecessary waste in our beauty and hygiene routines. *Queue the sighs and eye rolls*

BUT HEAR ME OUT! I’m not saying you have to be super rigid or extreme about your getting ready routine, but why not try to implement a more sustainable option every few days? Or even better, make it your daily routine if it works well for you!  

ACC-Toothpaste-WebSize-1803001.jpg

I started using a compostable toothbrush a little less than a year ago and have since gone through a few of them (your toothbrush should be replaced every couple of months!).  They are gentle on my sensitive teeth, but also clean the teeth and gums very well. The best part? I can reduce my disposable plastic consumption! Gondola brushes are one of the best deals out there for bamboo toothbrushes, and you can find them on Amazon.

I started using bamboo toothbrushes after I saw reports of plastic toothbrushes (and other plastic) that ends up polluting the environment--floating in oceans, littering beaches, and ending up in the bellies of marine creatures. Plastic doesn’t fully decompose, it just degrades, eventually getting cut up into smaller pieces of plastic called microplastics-- Yikes!

ACC-Toothpaste-WebSize-1803005.jpg

I also use homemade “zero-waste” toothpaste and supplement this with natural toothpaste products which can be purchased at most health food stores. Since you hopefully are taking care of yourself to brush your teeth two to three times a day anyway, it’s nice to switch up your toothpaste products a bit for some variety, and have your store-bought brands last a little longer.  Plastic toothpaste tubes are one more piece of plastic that ends up in the trash once all the toothpaste has been squeezed out. The very few that you do find with metal-based packaging are extremely difficult to recycle.

Fair warning… zero waste toothpaste will not have the same creaminess and smoothness as store-bought brands, but they it is still very effective in cleaning those pearly whites! The baking soda/coconut oil based ones, like mine, may have a little salty taste as well.  Spirulina powder assists in the re-mineralization of teeth but also gives it that nice minty green color. This recipe is refreshing, but go in with an open mind and remember this is not your typical toothpaste! So without further adieu, here’s the recipe!

ACC-Toothpaste-WebSize-1803007.jpg

Zero Waste Toothpaste

ACS-Blog-CranberryDillCashew2.jpg

- 3 Tbsp coconut oil

- 1 ½ Tbsp baking soda

- 30-35 drops peppermint essential oil or extract

- ¼ Tbsp Spirulina Powder

(Bonus if these are organic!)

ACS-Blog-Directions.jpg

- Combine ingredients in small container. I used a tiny glass mason jar.

- If coconut oil is crumbly or not completely smooth, melt over heat or in microwave.

- Cool toothpaste in fridge until it solidifies to room temperature coconut oil structure

- Apply a small amount to  your bamboo toothbrush, and brush brush brush all tooth surfaces, and concentrate on the gumline--for two minutes--then rinse – you know the drill!

TIP: You can use a small metal spoon or wooden scooper to apply toothpaste. Don’t dip your brush in the paste directly… that’s how you can spread germs! You can also transfer your mixture to a reusable squeeze tube if that makes it easier. Hope you enjoy!

ACC-Toothpaste-WebSize-1803010.jpg
ACC-Toothpaste-WebSize-1803017.jpg